Where did my money go I do not know
This post is going to be a long one, but here it goes.
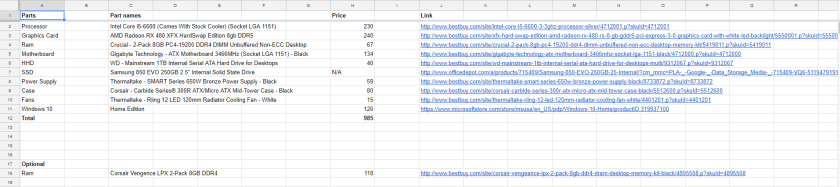
 After picking up all the parts, it was time to finally put everything together. Below is a list of parts I ended up getting.
Z170 Motherboard
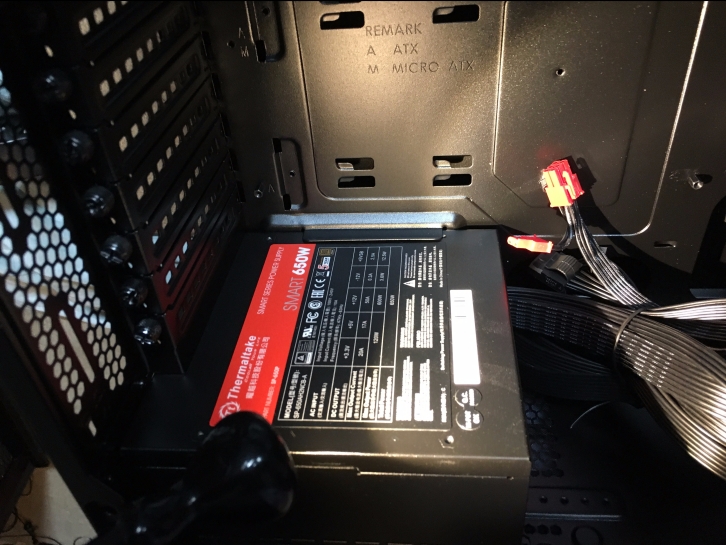
650w Power Supply
Core i5-6600 Processor
Radeon RX 480 Graphics Card
1TB WD Blue + 256GB SSD Storage
Corsair 300R Case
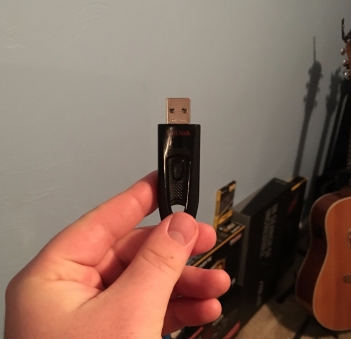
USB 3.0 Asus Nano Wireless Chip
The SSD isn’t shown in the picture, as I ordered it later. I also had extra hard drives lying around, so I tossed those in there afterwards.
I started with the motherboard, which is generally a standard way to begin a build. I installed the processor first (which was terrifying, it was one of the most expensive parts of the build), and then the stock air cooler that comes with the processor on top of that. Next, I installed the RAM, which was also kind of scary, just because of the sheer amount of pressure that needed to be applied to the motherboard. Once that was in, I was ready to mount the motherboard in the case, which means a few things.
First, I had to stick motherboard standoffs into the case, which keeps t he actual motherboard from touching the case. After having issues with the standoffs not lining up correctly, I finally got the motherboard properly seated. I must have tried installing it three times before getting it right.
I then installed the power supply unit into the case, which was probably the easiest part to install. Four simple screws and voila.
Next up was the graphics card the part I was most excited for. This is one of the primary components that factor into playing computer games, and this one specifically delivers high speed performance.

After that, I decided to install the hard drive for my computer, which was almost as simple as installing the power supply. A simple sliding case lets you secure your hard drive simply and easily.

The last part was to connect everything and wire it all up. This was, most definitely, the most stressful and sweat-drenched forty five minutes I ever spent with a computer. After about 10 zip-ties later, I was finally done. I had a pretty clean computer. No dust, and the cables were only a little bit messy.

It was time to boot it up. Now, keep in mind, Windows hasn’t been installed at this point, so what I consider a successful boot is if the motherboard’s manufacturer’s logo shows up on the screen when pressing the button (manufacturer’s name is GIGABYTE). Also, all the fans need to spin, otherwise, it means I failed somewhere along the line. All the lights turned on when I pressed the button, so that was a good sign. However, I only breathed a sigh of relief when I saw the screen turn on.


 Some of the things in there are irrelevant to today’s average PC, but others are a staple of modern computers, without which a computer would cripple. Everything in the PC was severely outdated, but the general layout of the computer was easy enough to follow once I had done some brushing up.
 After removing and reassembling the computer, I decided to boot it up to see if it still worked after I had taken it apart. After plugging in a monitor, I saw that everything still worked as expected. I then called my close friend Emmitt to come check out what I had learned. After teaching Emmitt how it all worked, I instructed him how to put it back together; this helped me to retain the information I had just learned. However, we didn’t get the computer to start up after putting it back together for the second time, it seemed we had bent a pin on the CPU (Central Processing Unit), which is possibly the worst that can happen to such a component.